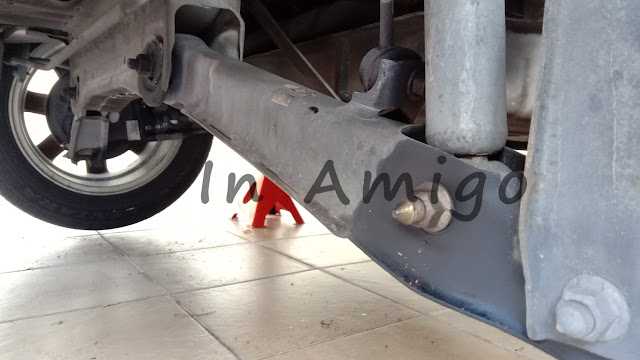
Changing everything absolute possible due to wear and tear
Car maintenance is very crucial to keep our car in good and healthy state.
I have been driving this car for the past 14 years without doing anything to the suspension system where the car handling deteriorates time by time.
Actually this job has been pending for the past 2 years and I have been thinking to change the entire suspension system including shock absorbers and each control arms all by myself except coilovers but busy working schedule makes me unable to perform this task until the last MCO enforced where I was staying at home for a couple of weeks with too much free time to spend.
So, this is the right timing to consolidate every parts and tools and get this done once and for all.
My initial plan is to start off with the front suspension first and then finishing it at the rear suspension.
It takes me a few days to gather all the necessary parts which I purchase the front lower control arm and rear lower arm at my local store and the rest at online store because my concern on the quality buying from online store where I can pre-inspect on the spot at local store before purchase them but to my knowledge now all these is wrong.
Buying from local does not guarantee good quality but everything from online is definitely way cheaper with lots of brand to choose from and I insist all of them are from Mitsubishi Motors as much as possible.
Work started few days after all the parts gathered and I took the liberty to apply WD40 to all screws and nuts required to be opened a day before just to lubricate the screw thread to ease removing process but the main purpose is to prevent from broken or loosen screw head.
In simple term, just leave the screw overnight after lube it and I did prove myself right.
Parts needed for front suspension are a pair of damper and I have chosen APM brand as 1 set (4pcs) of them for both front and rear only cost RM350,
A pair of front lower control arm from local store cost RM196,
Front shock absorber upper mounting and absorber cover cost RM64 and RM16,
And lastly, a pair of front stabilizer link cost RM36.
Equipment needed is 2 ton hydraulic jack, a set of 2 ton stand, spring compressor, a set of wrench and some simple hand plyers.
First, jack up the front body and place in the jack on both left and right side in order to remove the front wheel.
Take off the clip securing brake lines to the absorber housing.
Then, start to loosen the upper strut mount nuts 3 pieces.
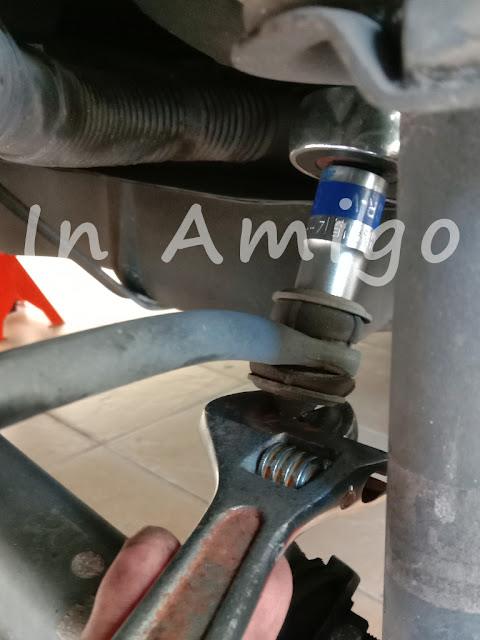
Loosen the shock absorber lower mount screws 2 pieces at the wheel knuckle and also the stabilizer link upper nut (try clamp with some plyer on the inner thread if the nut is too tight).
Next, loosen the lower arm pivot screw,
And loosen the back of the lower arm rubber mount screws.
Last screw to loosen is the lower arm ball joint screw and I have a hard time to loosen this as I forgot to apply some WD40 here overnight.
Jack up the wheel hub at the brake rotor at least until the drive shaft is at horizontal level.
Start to separate the lower arm ball joint by prying open it with some steel rod or pipe to the wheel knuckle.
Completely remove the shock absorber and please take something to hold the front brake assembly and I use the hydraulic jack to prevent it from falling off.
Hang the front brake assembly while continuing with other parts.
Completely remove the remaining lower control arm and stabilizer link.
This is the view of the entire suspension parts detached from the front wheel arch.
Old vs new right side front lower control arm.
Old vs new front stabilizer link.
Compressing the coilover spring and I am unable to remove the nut inside the strut mount as it rotates with the absorber shaft.
So, I went to the nearby mechanic shop to borrow their air gun and the front shocks consist of the damper with cover and shaft bush, coilover, upper steel plate and upper strut mount.
Now, I start to re-assemble everything in 1 piece and this is the whole shock absorber with new parts.
Then, I can start to reassemble the control arm. First, insert in the lower control arm mounting bracket to the notch and pull it with jam plyer.
Shove in the lower control arm pivot mount into the under the carriage bracket and secure with screw.
Jack up the lower control arm as horizontal as possible to screw back the bracket as this is the hardest part to work on or else the bracket will drop down and need to re-insert again which is very troublesome and remember to STILL maintain the control arm as horizontal as possible until the last step of this assembly on the wheel knuckle.
Next, install the new shock absorber to the upper strut joint first.
Then screw back the 2 screws to the shock absorber lower mount to the wheel knuckle.
Align the ball joint pin as straight as possible to the wheel knuckle,
And jack up the lower control arm to insert the ball joint to the knuckle as smooth as possible and if find the ball joint is very hard then please re-align the pin until success. Do not force it or it may damage the parts.
At last, fix the new stabilizer link and this is the right time to tighten all screws while still maintaining the lower control arm as horizontal as possible. Re-install the front wheel.
Do not forget to grease the front upper strut and that’s it for the front suspension portion.
That is the suspension part regarding the front wheel and now I will proceed with the rear wheel.
As similar to the front wheel side, lubricate all the screws and nuts and leave it overnight.
Few years ago I hit a deep pothole and my rear left wheel side generates a very loud metal clanking noise and till now I realized that the stabilizer link was broken apart.
Parts needed for rear suspension are a pair of damper which is 1 set with the front damper from APM brand,
A pair of rear lower arm from local store cost RM160 and long with short control arm that cost RM78
Coil spring rubber, rear damper stopper, rear shock absorber mounting bush and absorber cover all cost RM53.50,
And lastly, a pair of front stabilizer link cost RM37.
Jack up the car and remove the rear wheel. Start by opening the rear boot cushion cover to expose the rear upper strut.
Loosen the rear shock absorber damper shaft nut only and not totally remove it!
Then, loosen the upper strut mount nuts 2 pieces.
Next, loosen the short control arm pivot screw on the chassis.
And loosen the rear lower arm pivot screw also on the chassis.
Loosen the shock absorber lower mount screw.
Loosen the remaining short control arm screws secured to the rear trailing arm.
Take off the clip and screw securing brake lines to the chassis inside the wheel arch.
Broken stabilizer link mounting is being removed from the stabilizer bar.
Last screw to loosen is the rear lower arm screw connected to the trailing arm under the wheel hub.
Totally remove the screws at the shock absorber lower mount and the rear lower arm and use some wrench to separate the lower arm from the rear trailing arm.
Then remove the short control arm pivot screw.
Totally remove the short control arm from the rear trailing arm.
Next, totally remove the rear lower arm.
This is the broken half of my rear stabilizer link.
Completely take out the rear shock absorber and dismantle it very much same as the front shock absorber.
Re-attaching the damper stopper is a little bit tricky as the hole inside is a little bit tight and I rotate the top damper shaft nut and also use a slim tiny screw driver to guide the stopper into the shaft.
During assembling the shock absorber unit and tighten the damper shaft nut, please ensure the strut mount screw and the shock absorber lower mount hole are parallel to each other. Else, the whole shock absorber unit will need to dismantle and redo again as it will not able to fit in the designated screw mounting point.
At this point, install all screws but do not tighten it all until the last step when all parts are in place.
Do not tighten all nuts until the very last part was installed into the rear suspension
First, assemble the stabilizer link onto the rear lower arm.
Next, install the new shock absorber to the upper strut joint first.
Then install the rear lower arm at the pivot point and also shock absorber lower mount.
Screw back the short control arm to the rear trailing arm.
Slowly guide the rear lower arm using jack and push it slightly to align it into the rear trailing arm.
Jack up the rear brake assembly to align the short control arm into the chassis bracket in order to insert the pivot screw.
At last, fix the stabilizer link to the rear stabilizer bar and this is the right time to tighten all screws while still maintaining the rear lower arm as horizontal as possible. Re-install the front wheel.
Finally, all parts have been installed and wonder why there is 1 part missing? Yes, it is the rear long control arm as the screw and nut on the trailing arm is extremely tight until it almost got loose.
So, I have taken my car to a tyre shop to let them change this long control arm and also perform wheel alignment at the same time.
This is the rear alignment level just right after replace all suspension parts and notices the camber and toe was way too slanted and tilted.
This is the front alignment level just right after replace all suspension parts and the toe was still in acceptable range but camber was unable to adjust as the screw is not angle rotatable.
It took me 5 days to complete this entire suspension part replacement all by myself and I admit facing some difficulty sometime and if there is some electric tools such as DeWalt impact wrench would help to reduce the duration to 3 days top.
Video below showing the difference between a good and faulty damper as well as new and old strut mount condition.
That’s all for my beloved Proton Persona suspension parts replacement and I can say now the car handles exactly as new and going through bumps and potholes is not as wobble as before.
Once again, I love driving this Lotus tuned handling sedan car. Cornering on this car is as stable as a LanEvo now. Hahaha!
Thanks for reading and if you anything to say then please feel free to leave it down in the comment section below.


Comments
Post a Comment